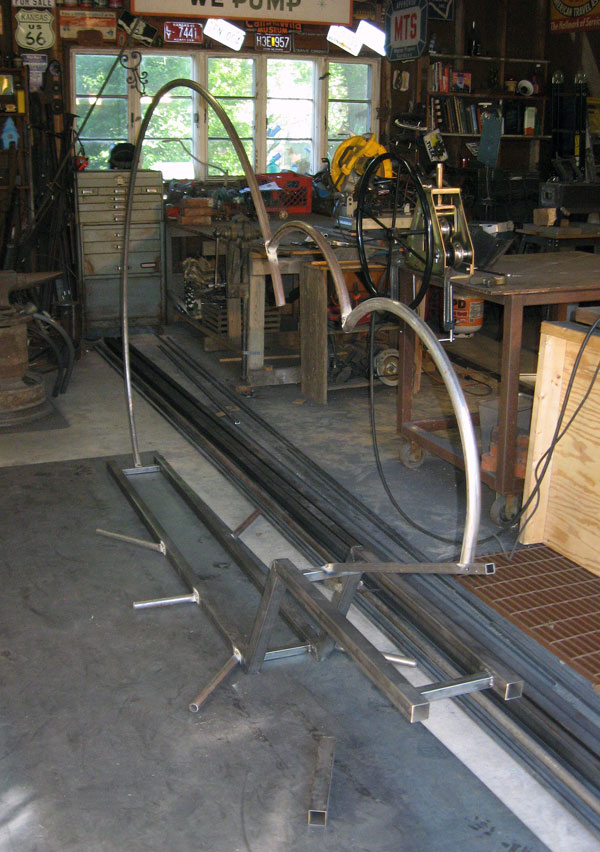
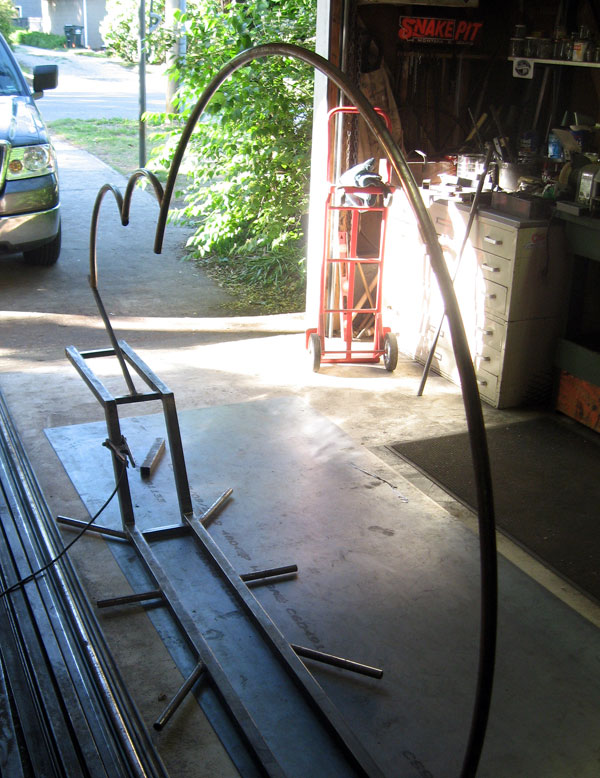
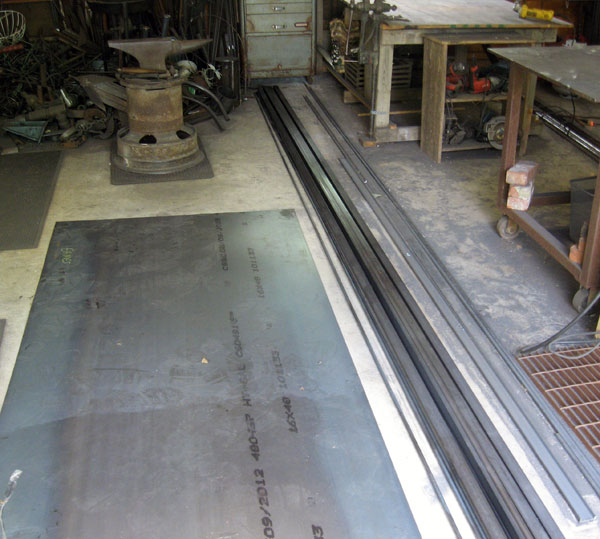
OK, after the frame is finished, it was time to roll some tube. I used a simple tube roller (Harbor Freight Tools) to help (see it in the background, attached to my welding table). It helps to have a set of extra hands, especially with a long roll. So, I recruited my son and his friend to guide the tube while I turned the wheel. I used three sections of 1-inch tube to create the shell. A few welds later and a graceful form was born.
Adding legs to the rolling ball sculpture
After the frame is complete, the next step is adding the beginnings of the insect's legs. These are important. The full weight of the piece will shift to each of these six legs. So, good welds and proper placement are crucial. In this photo, the leg sections are made from 1-inch round tube. The lower sections of the legs will be added soon.
Adding strength to the frame
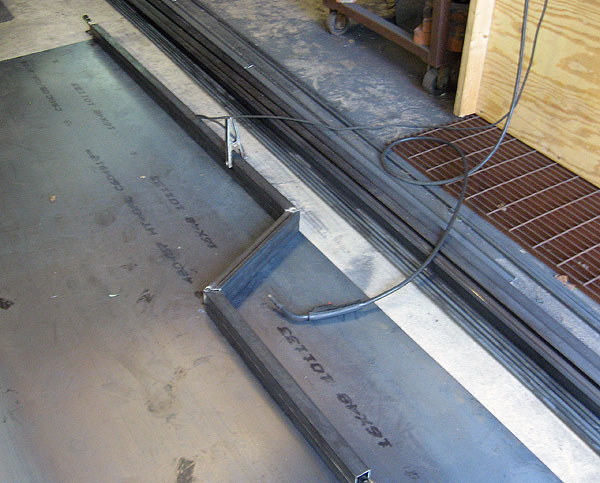
After the twin frames were made, I proceeded to add blocking to tie the pieces together. Smaller sections of 1-inch steel tube secure the larger frame pieces. The length of the frame is about 9-feet in length and is 2-feet wide.
Welding up a pair of frames
The base of ‘Roly Poly’ needs to be strong. I cut and welded several pieces of 1 1/2 steel tube. Much of the sculpture will be attached to the base. I think of this like a foundation. It needs to be level, square and close to perfect.
Fresh steel arrives for rolling ball sculpture
Nothing like the sound of a big truck pulling up outside the shop to drop a bunch of steel. Another early morning delivery of the good stuff. This material will be used in the fabrication of ‘Roly Poly’, an interactive rolling ball sculpture. Bar stock, square and round tube and sheet metal will be used.
The beginning of the rolling ball sculpture
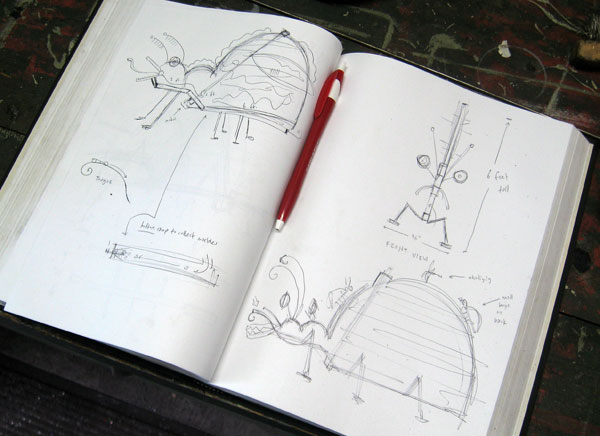
The next few weeks will be filled with the design, construction and installation of my first rolling ball sculpture. This piece will be on display as an interactive public art sculpture at the Lee's Summit Downtown Days festival. As with most of my work, every idea begins in a journal. Here are the beginning sketches of this funky beetle.
New tops for deck posts
No need to have plain or boring tops on your deck posts. These tall, utilitarian metal posts will hold hanging plants, birdfeeders or windchimes. Plus, they make a great spot to string party lights across your outdoor space. The metal hoops on the top are perfect for looping lights, however you like.
Each post stands four-feet tall, so they will definitely add a vertical element to the deck. Each post is made from steel elements and painted with black enamel paint.
Nature park signs are put in their place
Sunday dawned cloudy and dry. After a couple of days of big storms, this was our window of opportunity. The Ray Harrall Nature Park is located in Broken Arrow, Okla. A beautiful nature center is the gateway to the trails that lace across the area. The signs were installed by the main stone sign by the parking lot. The Tulsa Audubon Society has been creating a native plant habitat around the stone structure. The new signs will add some information about the gardens. This first photo shows the installation area.
Time to dig. The holes were pretty easy to make. Sandy soil and no rocks or roots.
Several bags of concrete and the signs were in place. Just a little leveling and adjusting needed. As we were finishing the pour, a few rumbles and sprinkles halted our momentum.
Here are the unveiled signs, cloudy day and all.
I designed these signs to be tough and sturdy. The 4x4 legs and lateral supports anchor the signs. In addition, the steel frame top gives a clean and strong finished look.
The bolted attachments on each sign will give access to the interior of the signs, if needed.
Finished! Always a good feeling. Here are a couple shots of the completed project.
A final flourish for the signs
Painting the park signage structures went smoothly. A couple coats of black enamel will create a durable finish. The frames I left for last. I added attachments on each to bolt to the main structure. Both frames were also primed and painted. The photo below is before the black paint was applied.
I had to pay special attention to the sign graphics. I produced these and had them printed on a poly-metal material. This should ensure that they stand up to the moisture and sun. Water is the main culprit to defend against. So, I sealed the Lexan panels in for each frame with a silicone adhesive, the same type that is used to seal shower enclosures.
Next, I cut a plastic backer board to rest between the graphics and the metal plate. This will raise the sign graphics above the metal plate that is the bottom or back of the sign. So, just in case any moisture makes it way in, the printed graphics are high and dry.
Here is a look at the finished sign graphics. Bold colors and easy-to-read typography were critical design components.
Painting the park signs
I spent this morning painting the two park signs. I use enamel paint for its durability, especially outside. This photo shows each sign wearing its new coat of gray primer, which provides a good base for the paint. I cleaned the steel with acetone first. This removes oil, grease and other contaminants.
Metal park signs under construction
This week I have been working on a pair of informational signs. These signs will stand in a small park in Broken Arrow, Okla. Lots to design problems to solve. These need to be tough against the elements and pesky parkgoers. Here are few photos along the way.
The signs are beefy. Each stands more that five feet tall. But after they are installed in the ground, they should reach a little over three feet. Perfect to present the graphics. Sorry about the blurry photos, my camera is acting funky.
The informational graphics will be display inside this removable metal frame. This will act as protection and give a finished look to the top of the sign.
The sign graphics will be covered by a 1/4-inch piece of Lexan. Lexan is much more durable than traditional plexiglass. It is hard to scratch and break. Plus, it stands up to the sunlight better.
Metal conch shell ready for display
Last week, this large metal conch shell left the shop. It is more than 2 feet wide and tall. I installed some longer offset tubes on the back, so it will appear to float against the wall. I finished it off with a natural rusty finish, sealed with an acrylic coating. This sculpture will hang on the back wall of a house. Hey, it may not be in the Florida Keys, but it will remind the homeowner of one of their favorite places.
Time to fix a toy
I have been toiling with this cool metal toy. This is a project for the Lee's Summit Historical Museum. Lots to do, but to this point, I have repaired the long rivets that hold the horses together. Next, I will try to figure out a way to connect all the horses to the rider. Stay tuned.
Airstream trailer plate
Recently, I made this license plate-style Airstream plate. This will fasten to the front of a vehicle that can haul one of the vintage trailers. This plate is cut from stainless steel and incorporated into an existing frame. I hope it has many good miles on the road.
More metal Monster Birdfeeders on the loose
A couple more of these mischievious birdfeeders are ready to leave the shop. These Monster Birdfeeders are perfect for mounting on a railing or hanging on a tree or shed. It won't be long until cardinals and chickadees are perched in their mouths enjoying a meal. The top is hinged to allow access to add seed and clean. Each birdfeeder is given a warm rusty finish and then coated with an acrylic sealer. Imagine several of these lined up together!
They look right at home amongst the fallen leaves.
A place to capture bottlecaps
Recently, had a request from a customer to make a wall-mounted bottle cap catcher. He is a home-brew hobbyist and this will hang below a bottle opener to catch the discarded caps. So, using a simple barley and hops concept, this container was the result. It is handmade from steel sheet. The pattern is cut with a plasma torch. The piece is welded together and then given a rusty finish. An acrylic sealer coats the catcher for protection.
Metal Jayhawk ready to hang on the wall
This big metal Kansas Jayhawk is bound to be a great birthday gift. This wall hanging is hand cut from steel sheet and burnished with a sanding pad and wire brush. Hopefully, it will bring some college spirit to a young fan's room.
A metal bird feeder made for a stump
A couple of week ago, I finished a really cool bird feeder project. A customer lost a huge pin oak tree in her frontyard. A 28-inch diameter stump was all that remained after the tree was removed. The stump would make a perfect platform for a large bird feeder. This feeder has four-sides. Two hinged hatches allow seed to be poured into the plexiglass-fronted container. A large diameter tray holds it all. The piece was bolted down for security. The wood was so tough to drill. The drill bit was smoking.
Winter at Fossil Gardens
Wow. What a mild and snow-free winter we have enjoyed. Especially after the previous two winters. The prairie is still brown, but if you look closely, green shoots are appearing. The sculptures stand out more this time of year.
A stake to the heart
How's this for an anniversary gift? A simple LOVE garden stake ready to plant in the yard. This was made for a client to give to her parents on their big day. This hand-cut metal garden stake stands over 5-feet tall. It will look great year-round, especially in late summer, surrounded by flowers. At the bottom, two sturdy prongs will hold the piece in place. The two small hearts record the year they were married. Enjoy!

