Section by section: Building a better fence

I have really enjoyed making the latest fence and gates to come out of Fossil Forge. This fence project will include two gates and an arbor. The fence sections use 1/2 round steel for the pickets. Each section is 5-feet in length and will be welded to the posts. The photo shows the sections stacked up, ready for the next addition.

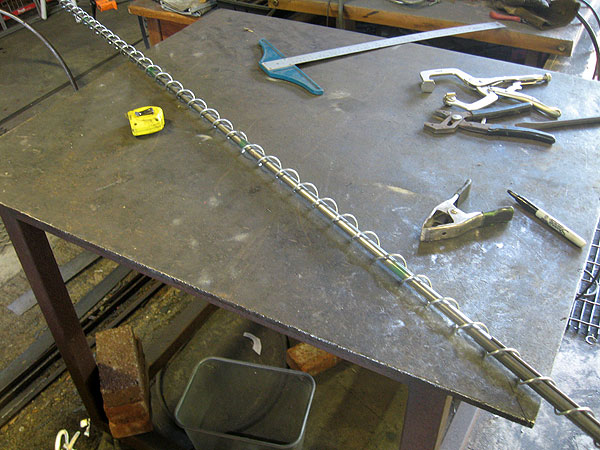
Each section will feature three small loops. I made these using a simple jig and some heat. There are two different sizes of the loops.

Here are the sections with the loops in place. These are now ready to travel to the fence site.

Interior Craftsman-style railing is under construction

I am in the process of creating a cool interior railing, especially its practical design. This railing will be at the top of a series of stairs leading to a remodeled attic room. Because of the narrow space, the railing needs to be removable for the movement of furniture and other large items. So, the railing will slide into post channels. This way, with a little lift, the entire railing can be removed and placed to the side. Here are a couple of shots of the construction. The first shows the 3-inch square steel tube with the channels being welded into place.

Here is the railing section before the added detail.

Steel raised garden beds holding a small harvest

Here are two steel-sided raised garden beds I built earlier this summer. After a hot, dry year, the garden is beginning to produce, now that the cool fall temperatures have arrived. These beds are each 4 feet by 8 feet. I filled each with a compost-rich soil mix. They are filled with tomatos, eggplant, squash and herbs. The beds are on the southside of the house, so they are protected from the colder winter winds, so I hope this will extend the growing season. I have left them to age beautifully in rust. A perfect fit here at Fossil Gardens.

Rolling ball sculpture at Longview Art and World Music Festival

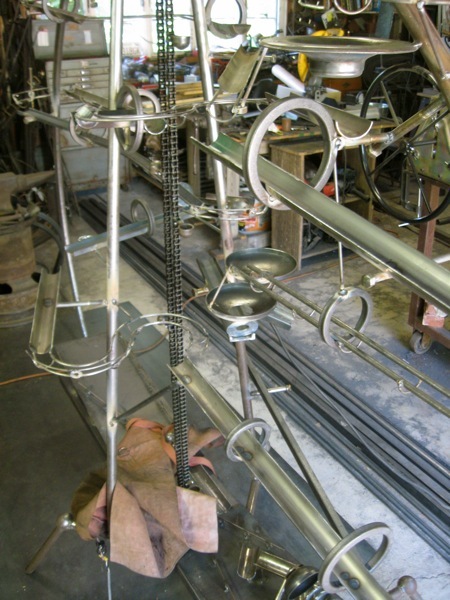
I have enjoyed a fun couple of days displaying 'Roly-Poly' at the Longview Art and World Music Festival in Lee's Summit, Mo. Although the weather was brisk and breezy, plenty of kind and interested folks stopped by to look and listen. 'Roly-Poly' is a beetle-shaped rolling ball machine. You drop marbles on the tongue, which feeds into the insect's stomach. Then, a chainlift carries the marbles up and then gravity takes over. Lots of action and noise. Perfect for the festival.

Old and young and everyone in between enjoyed the action of 'Roly-Poly'.

No leaves to rake with this metal garden tree

The latest project to come out of Fossil Forge is this large metal garden tree sculpture. This piece is called 'Symatree'. Made of multiple sizes and shapes of steel, the tree rises almost nine feet tall. It spreads almost eight feet wide. Over time, it will take on a beautiful rusty hue, aging in this little pocket garden. No matter the season, imagine the beauty this stoic steel sculpture will bring.

The top of the tree is crowned with an old farm tiller. It does turn on its spindle, but it is too heavy for the wind to make a difference.

More Monsters in Metal

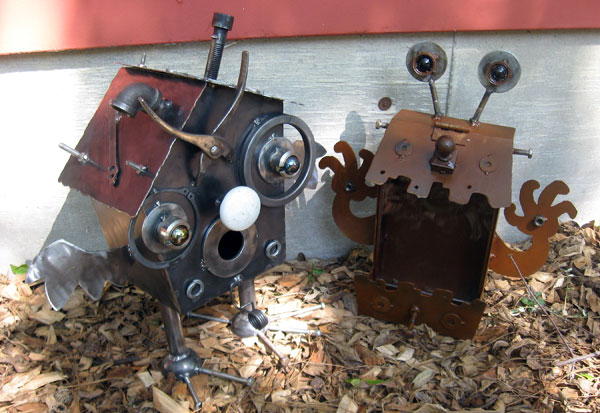
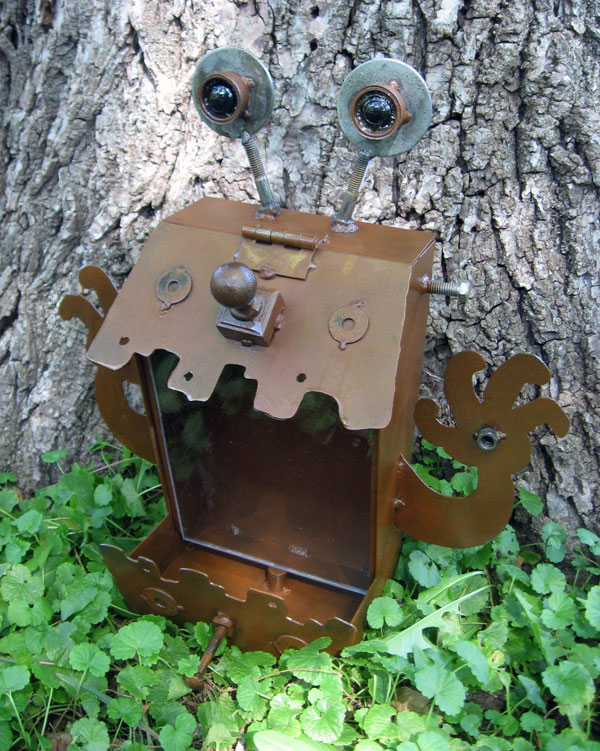
A lovely pair of Monsters are these! A Monster Birdfeeder and Monster Birdhouse have left the shop for a new home. Both of these pieces are completely handmade from steel and found objects. The Birdfeeder has a beautiful rust finish, which will look great in the garden. The Birdhouse has a natural steel sheen. It can go outside, but it will take on a rusty hue over time. 

Out in the wild, the Monster Birdfeeder is looking good! The Birdfeeder has a removable plexiglass front that can be cleaned. Otherwise, it will clearly show off the tasty treats you give to the birds.

Metal Jayhawk looking good in the neighborhood

I can only imagine the muscle it took to set this large post rock into the ground. But it looks sturdy and strong. The steel Jayhawk has a dual purpose: Hold up the mailbox and show off some KU pride. A big thanks to Lynn for sending along these photos. Enjoy!

A couple of views of what the postman will see.

This last photo shows the offset from the uneven stone face. A little tricky, but it worked out well.

A mailbox and a metal Jayhawk

I really enjoyed working on this latest project. A customer needed a special Kansas Jayhawk bracket for their mailbox. Instead of using a traditional wooden post, they bought this incredible post rock. These post rocks were used across portions of the Great Plains, especially western Kansas. The lack of wood for fence posts was substituted with the use of limestone found throughout the region. Each post was hand-quarried and cut. What an effort that must have been! These posts can weigh hundreds of pounds.

Because the face of the limestone post was not flat, we had to fashion a couple of lengths of tube to conceal the Tapcon screws. We used a hammer drill to pierce the rock, which was actually pretty soft. A few screws and washers and the bracket was attached. Later, the customer will mount the steel mailbox, further strengthening the entire setup.

The Jayhawk logo is handcut from 11 gauge steel. Very sturdy. I applied a natural rust finish which will be sealed with acrylic. The result: A one-of-a-kind mailbox that looks great in its Kansas frontyard!

Fixing a John Deere tractor toy

Projects in the shop can be varied. It seems I always have a repair or restoration job to do. This little pedal tractor had problems with its rear axle. So with a little welding, grinding and cutting, the wheels are working again. Unfortunately, I had to remove some of the classic green and yellow paint job. But that can be touched up. Enjoy the ride!

The axle rod had to be reshaped to fit a new square washer assembly attached to the wheel.

A special word for Sam

It has been a hot month in the shop. The long stretches of work I enjoyed in May were absent in June. Blazing temps and humidity kept my duties abbreviated. But, I still managed a few things. Here is a Window Word for a special pet named Sam. It has a beautiful blue glass ornament. This one is bound for Massachusetts. Do you have a word or phrase you would like to see in metal? Just call me or email and I'd love to make a Window Word for you.

First day at the festival

Roly-Poly is in place under the protective cover of a tent. It is a beautiful first day of June. Lots a visitors. The beetle worked pretty well. Just a couple of glitches. I loved watching kids, old and young watch the marbles move. Pretty cool.

Moving day for the rolling ball sculpture

The festival begins today. So, I summon the kids to help me load the beetle. Not to technical of job, just some muscle and well-placed blocking. I only have to travel a few blocks, so not a major deal. Off we go!

Roly-Poly, the rolling ball sculpture is almost ready

I added several new features this week. More ramps, turns and modifications. The marbles are rolling nicely. I covered the motor with an old leather apron to protect it from the welding sparks.

I used a old wok, which we found at a thrift store, to add a cool bowl effect at the end of the marble run. A little bit of grinding and the bowl is looking good!

Some of the final pieces and track are in place. We are getting close.

Rolling ball sculpture is taking shape

A few solid days in the shop. I have made some good progress, with only a couple of setbacks. This photo show the view down the chute of the beetle's throat.

Here, some of the initial stretches of track are in place. Lots of trial and error during this process.

On the right side of this photo is a round flange. This creates a very nice whirlpool effect for the marbles as they pass through. Lots of spinning and then a drop.

Picking up the marbles

One of the trickier parts of building this sculpture was the ball pick-up. A combination of gravity, alignment and speed was crucial. When it finally worked, well, I was relieved. Now on to building the rest.


Getting marbles into the beetle’s belly

One tricky aspect of this project was the need to allow viewers to interact with the marbles. This beetle-shaped rolling ball sculpture, has a long tongue, that people will be able to roll a marble down. Slowing down a fast-moving marble was a key. I used a series of springs, cups and switchbacks to reduce the speed of the the marbles, especially as they neared the lift chain.

Chain lift for the rolling ball sculpture

OK, time to try another solution. I bought some chain and two new sprockets for the existing electric motor. I mounted the motor under the skeleton of the beetle. Actually, I like the positioning of this setup better. The chain will have eight cups attached to it. These will carry the marbles to the top of the sculpture.

Trouble with the lift screw for the beetle

I tried. I really tried. But the Archimedes screw lift got the best of me. I thought everything was looking good. The screw lift is more than six-feet tall. A lot can go wrong in something that long. If the screw is not true, it will not lift the marbles properly. Here is a photo of the screw before being attached to the motor.

Next, I attached to motor and gear mechanisms to the frame of the bug. Alignment is key. I used two gears, so the screw would turn counter-clockwise.

In the end, the screw lift was a little bit off. The marbles worked their way up the lift about halfway, before tumbling back down. So frustrating. But, this is a learning experience. Time to try another way.


Rolling ball sculpture grows legs

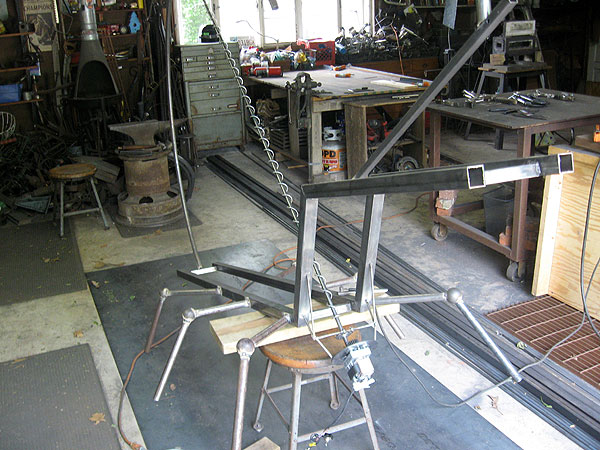
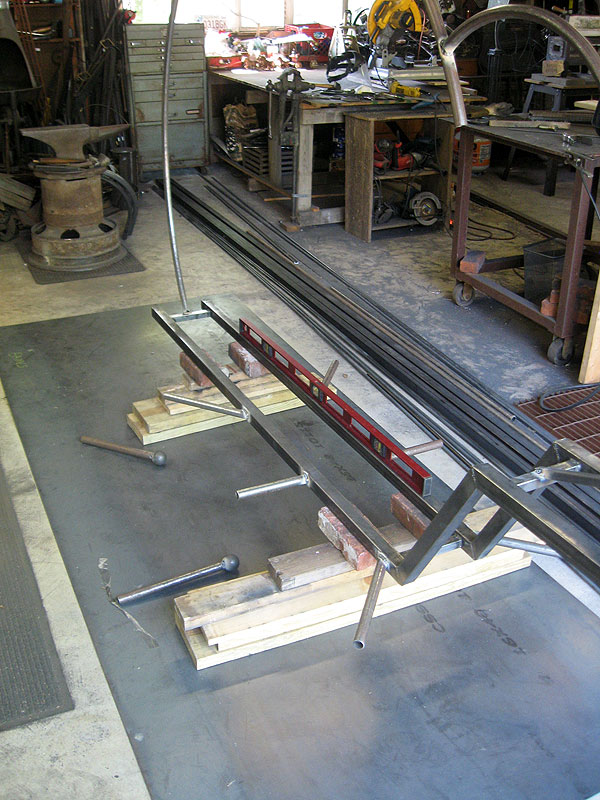
Time to finish the legs on this beetle. As you can see, lots of high-tech leveling equipment. A few boards and bricks and we're ready! Each leg has a solid steel ball for a knee cap or leg segment.

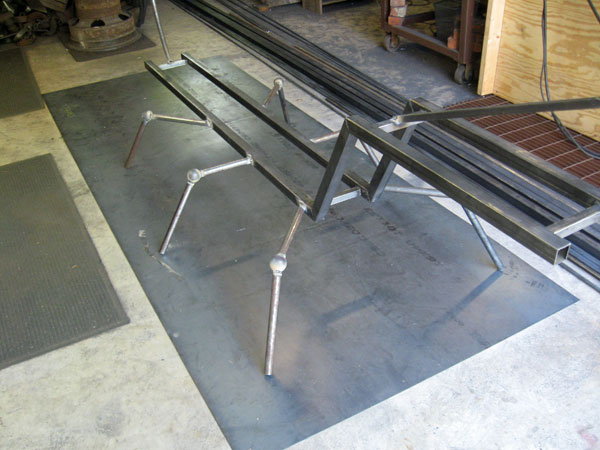
All finished. The beetle now has six properly-scaled legs to stand on. Definitely building from the ground up.